How to Open
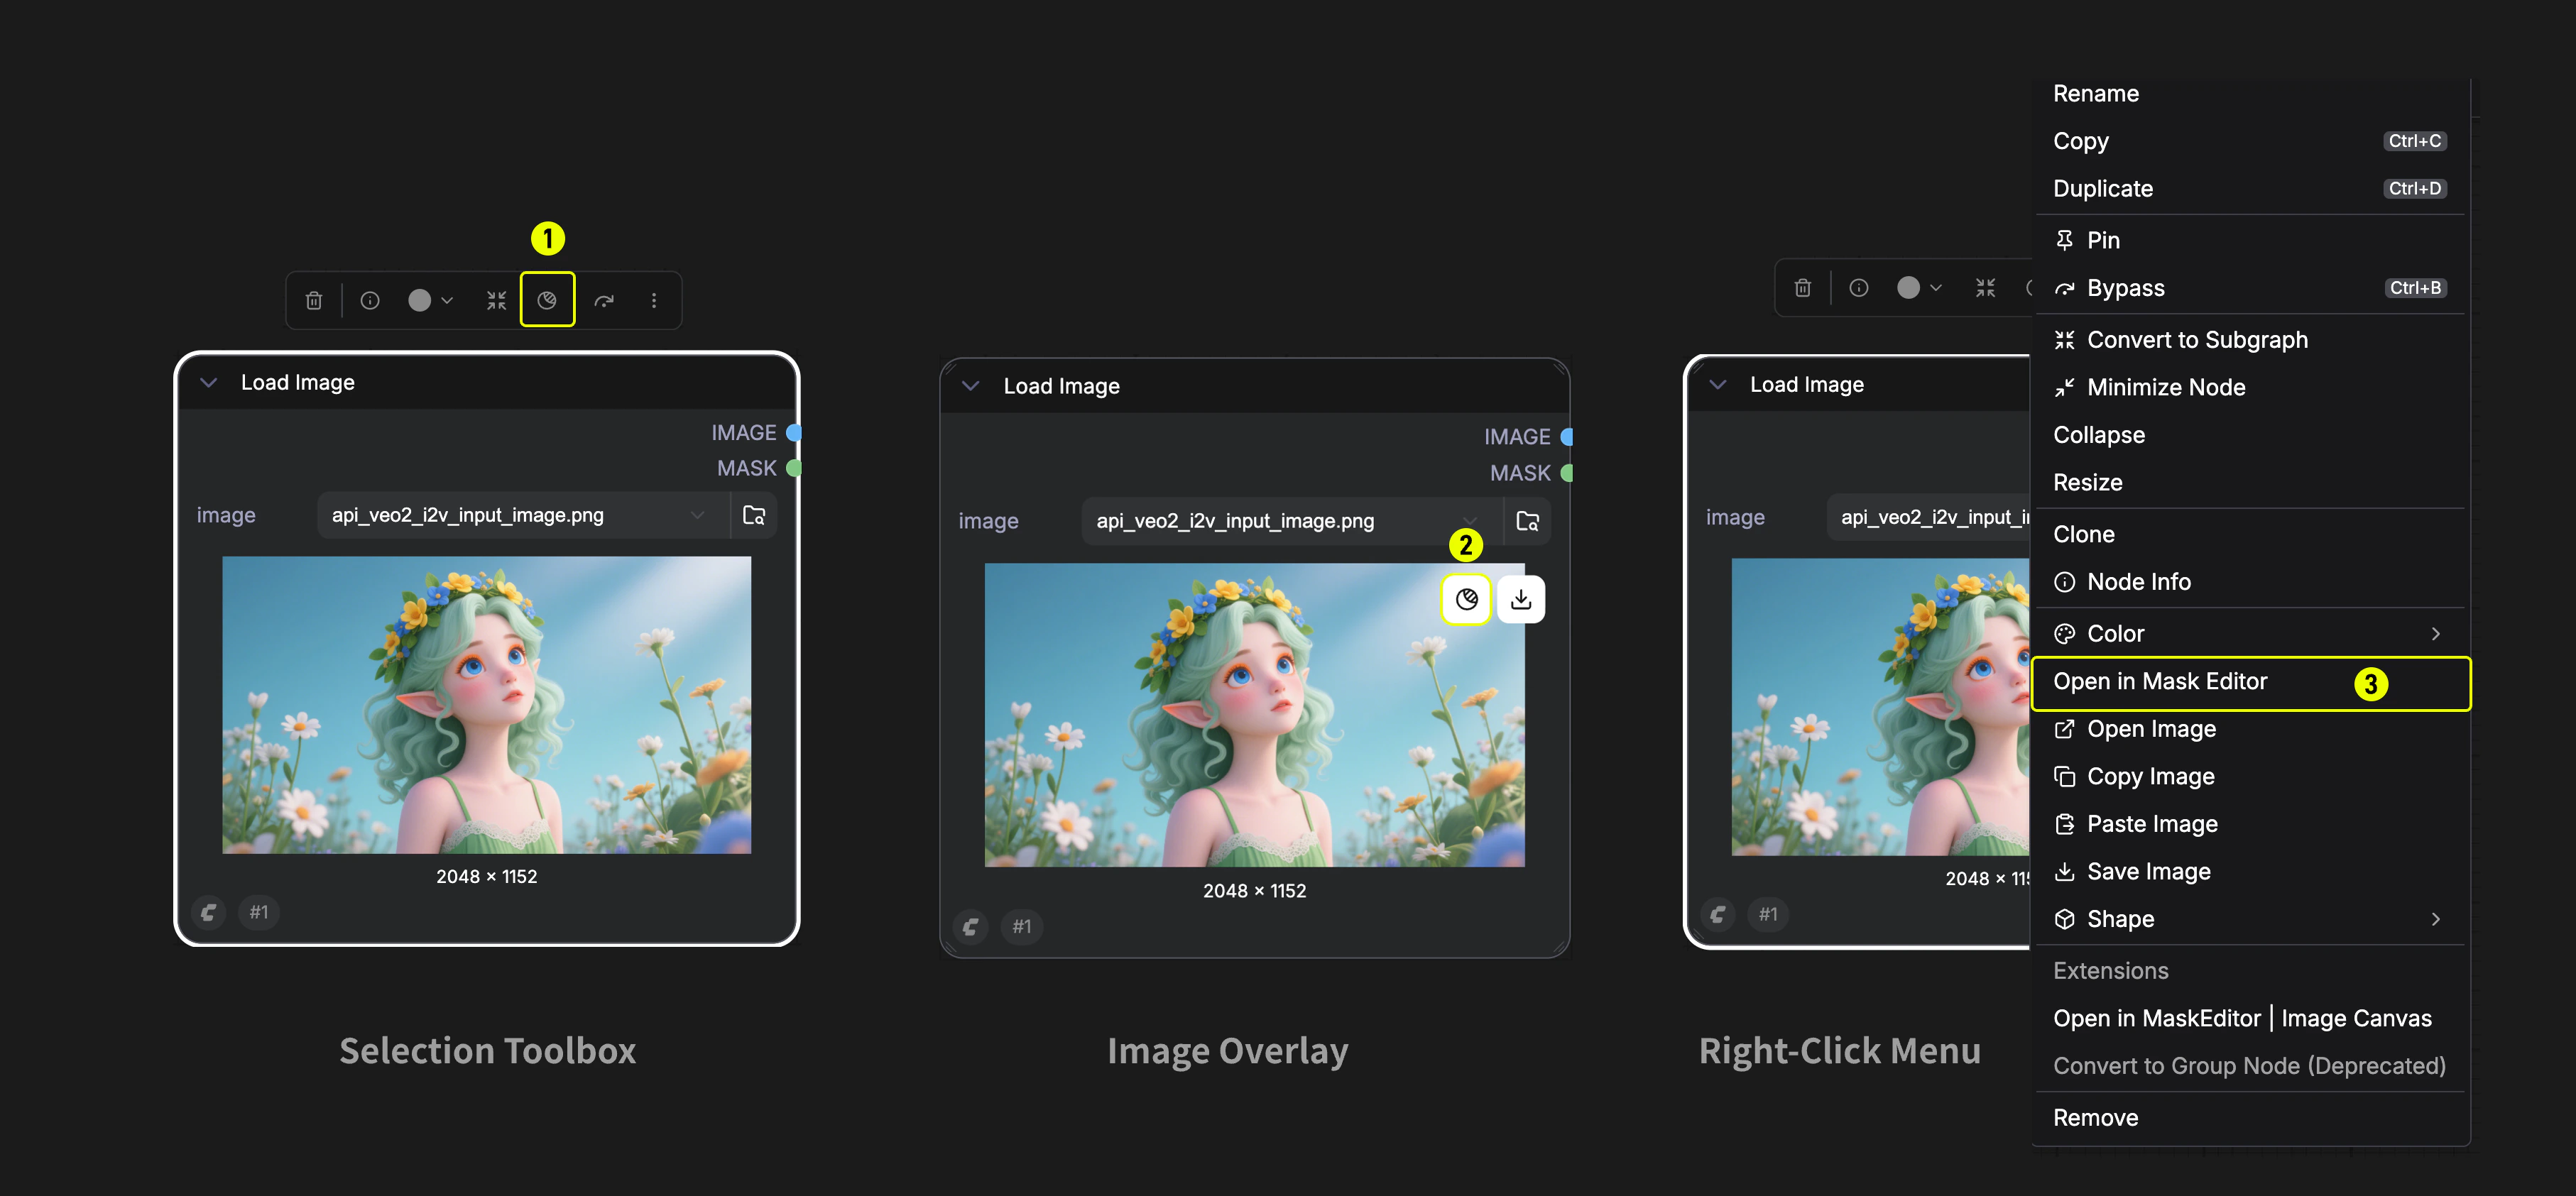
There are three ways to open the Mask Editor:- Selection Toolbox — Select a Load Image node, then click the Mask icon button in the selection toolbar above the node.
- Image Overlay — Hover over the image preview (gallery mode), then click the Edit or mask image button (mask icon) that appears in the top-left corner.
- Right-Click Menu — Right-click a Load Image node and select
Open in Mask Editorfrom the context menu.
The Mask Editor is available in both Graph Mode and App Mode.
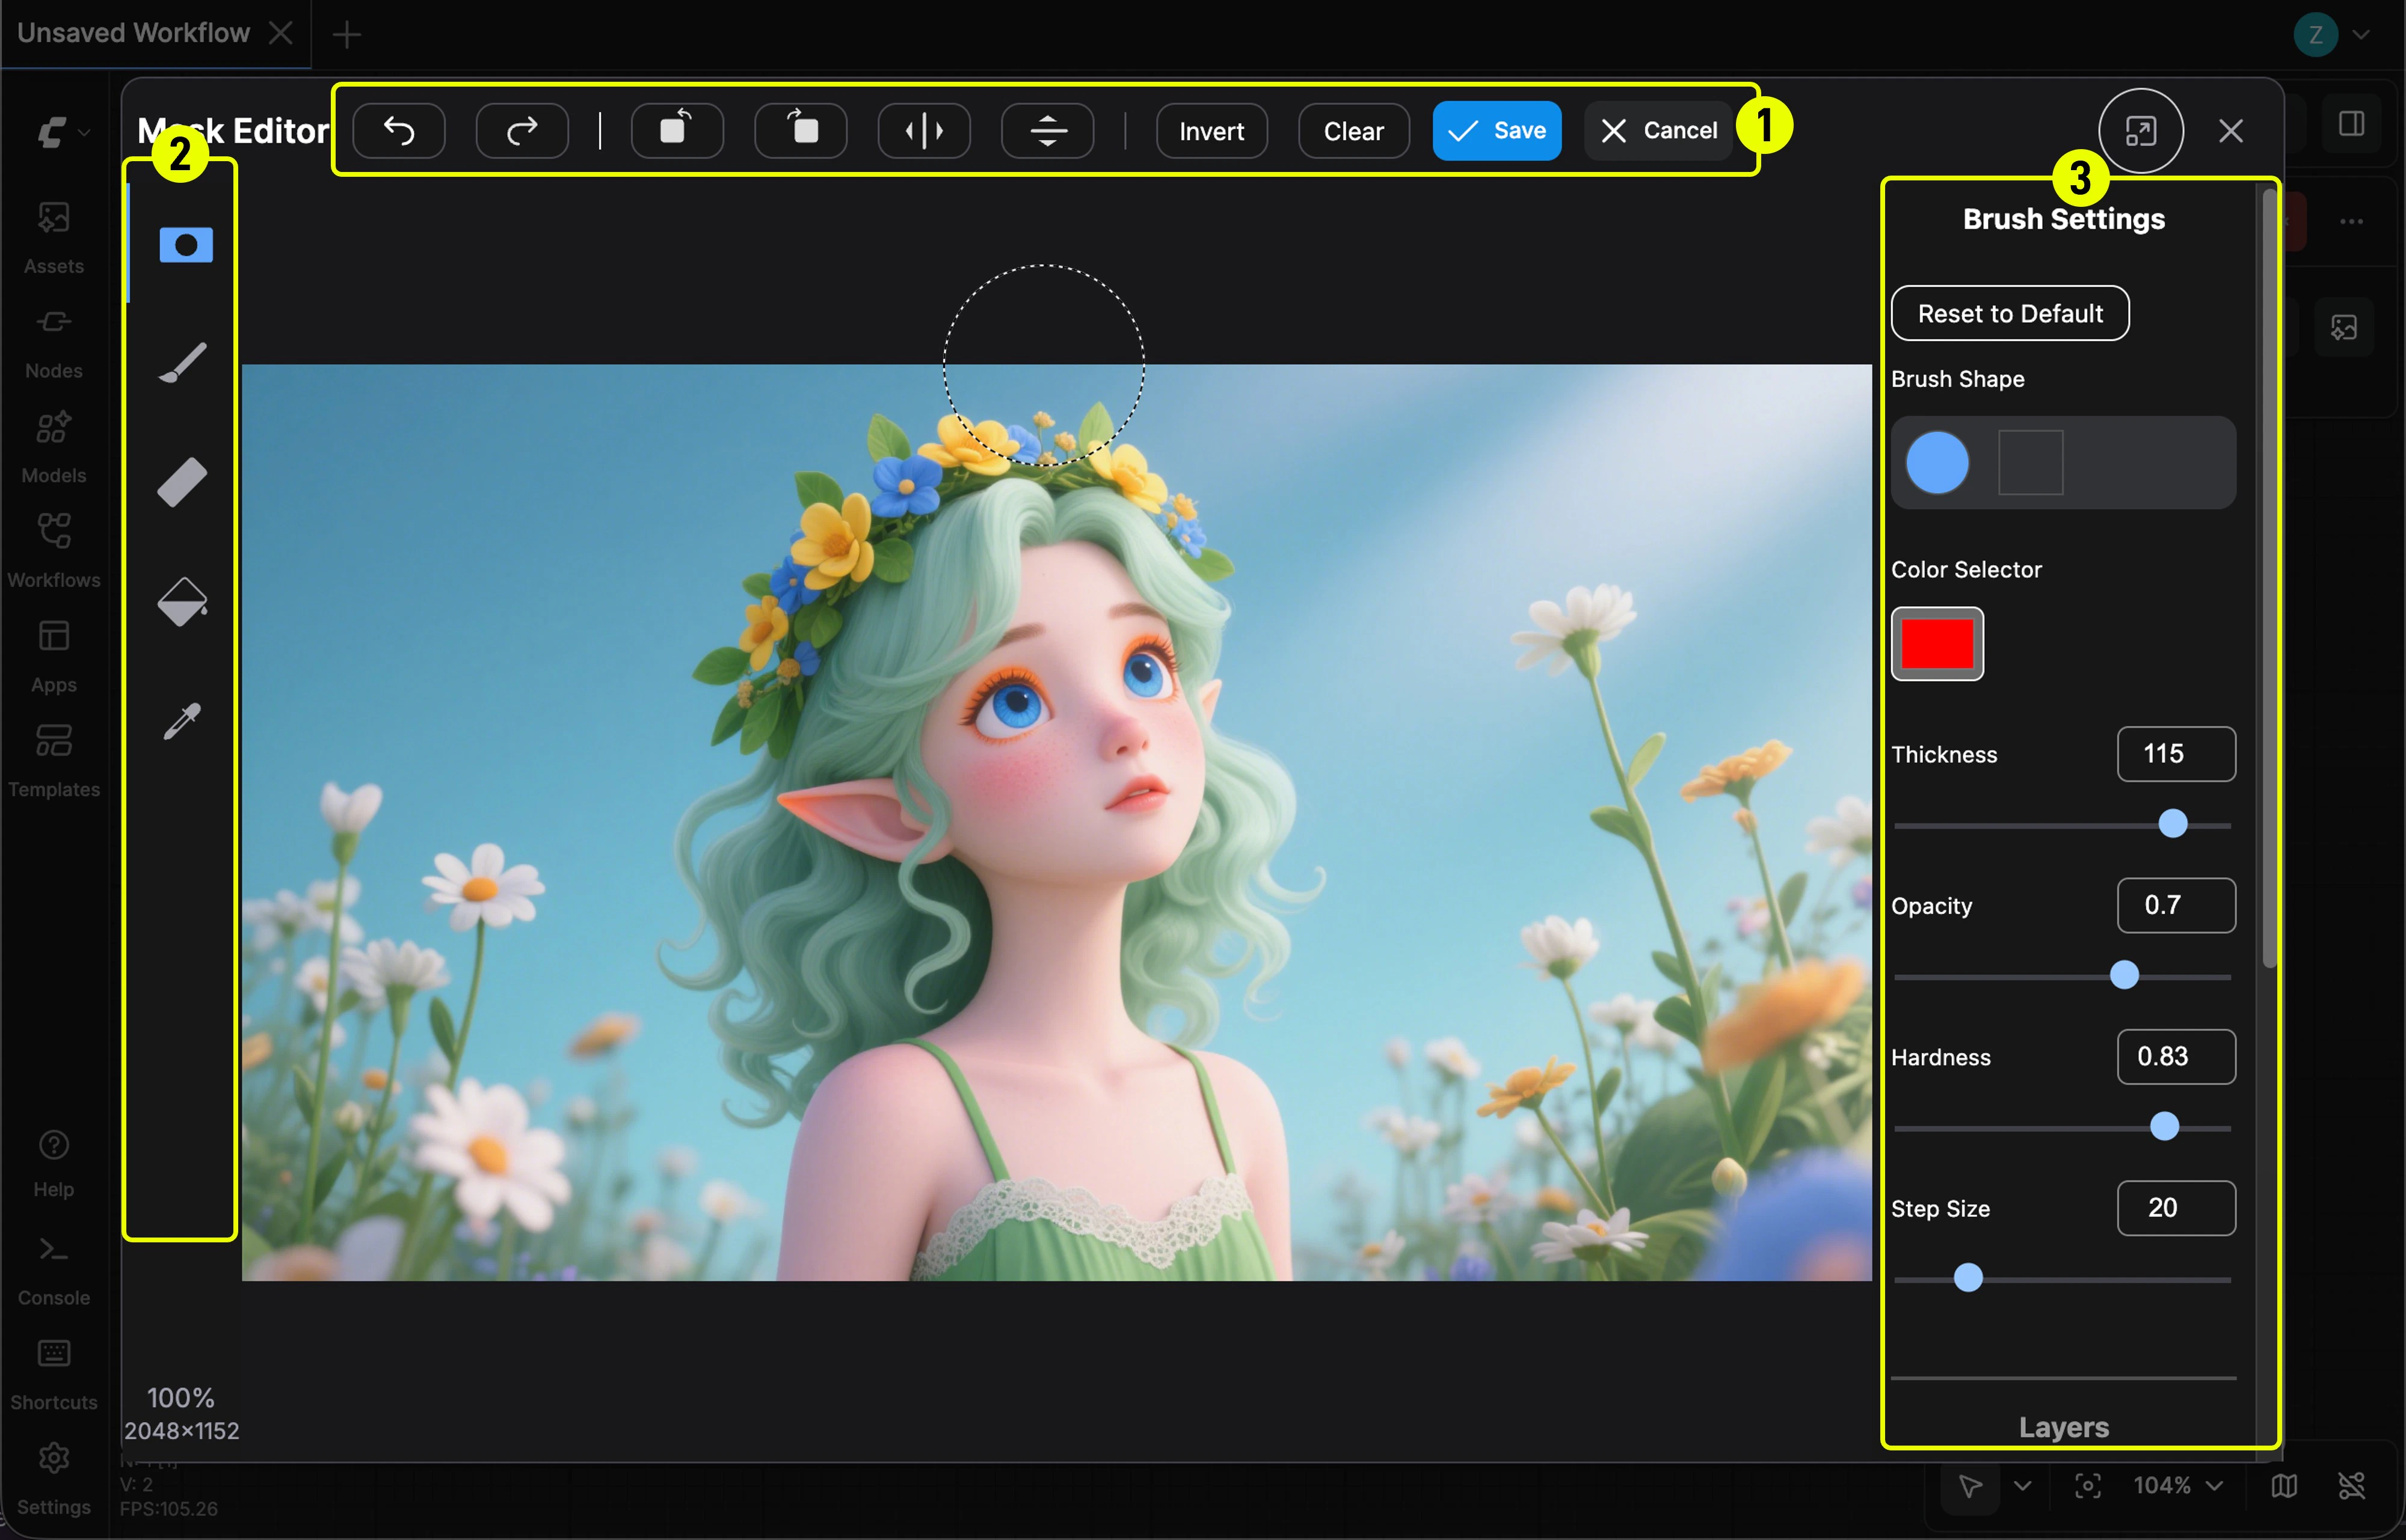
Interface Overview
| # | Area | Location | Description |
|---|---|---|---|
| 1 | Top Bar | Top | Header with undo/redo, canvas transforms, invert/clear, save/cancel |
| 2 | Tool Panel | Left | Tool selection and zoom info |
| — | Pointer Zone | Center | The main canvas area for drawing and editing |
| 3 | Side Panel | Right | Tool-specific settings and layer controls |
Tools
The tool panel on the left side offers five tools. Select a tool to activate it, and the right panel will show its settings.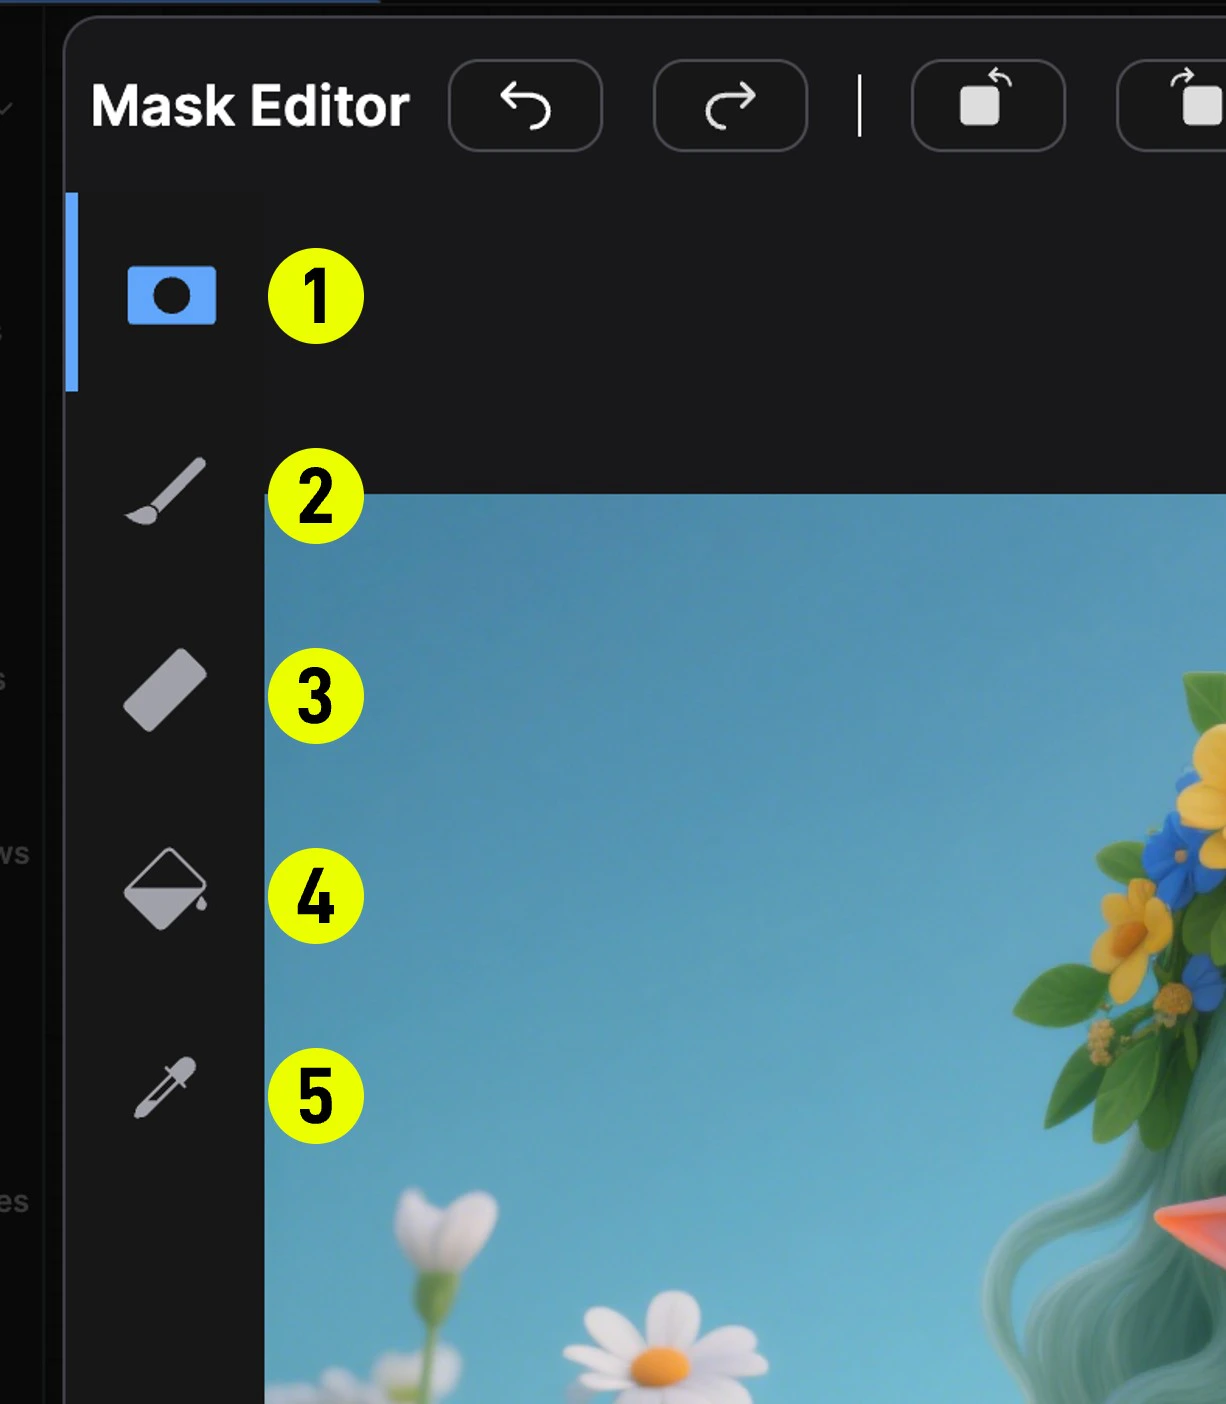
| # | Tool | Layer | Description |
|---|---|---|---|
| 1 | Mask Pen | Mask | Primary tool for drawing mask regions. Left-click and drag to paint mask on the image. |
| 2 | Paint Pen | RGB (Paint) | Paint directly onto the image’s RGB layer. Useful for inpainting or touching up the base image. |
| 3 | Eraser | Mask / RGB | Erase parts of an existing mask or paint layer. |
| 4 | Paint Bucket | Mask | Flood-fill tool based on color similarity. Click a pixel to fill the connected region with a mask; click an already-masked area to erase from the mask. Tolerance controls how broadly the fill spreads. |
| 5 | Color Select | Mask | Selectively mask all pixels matching a target color, with advanced matching algorithms (Simple HSL / LAB). |
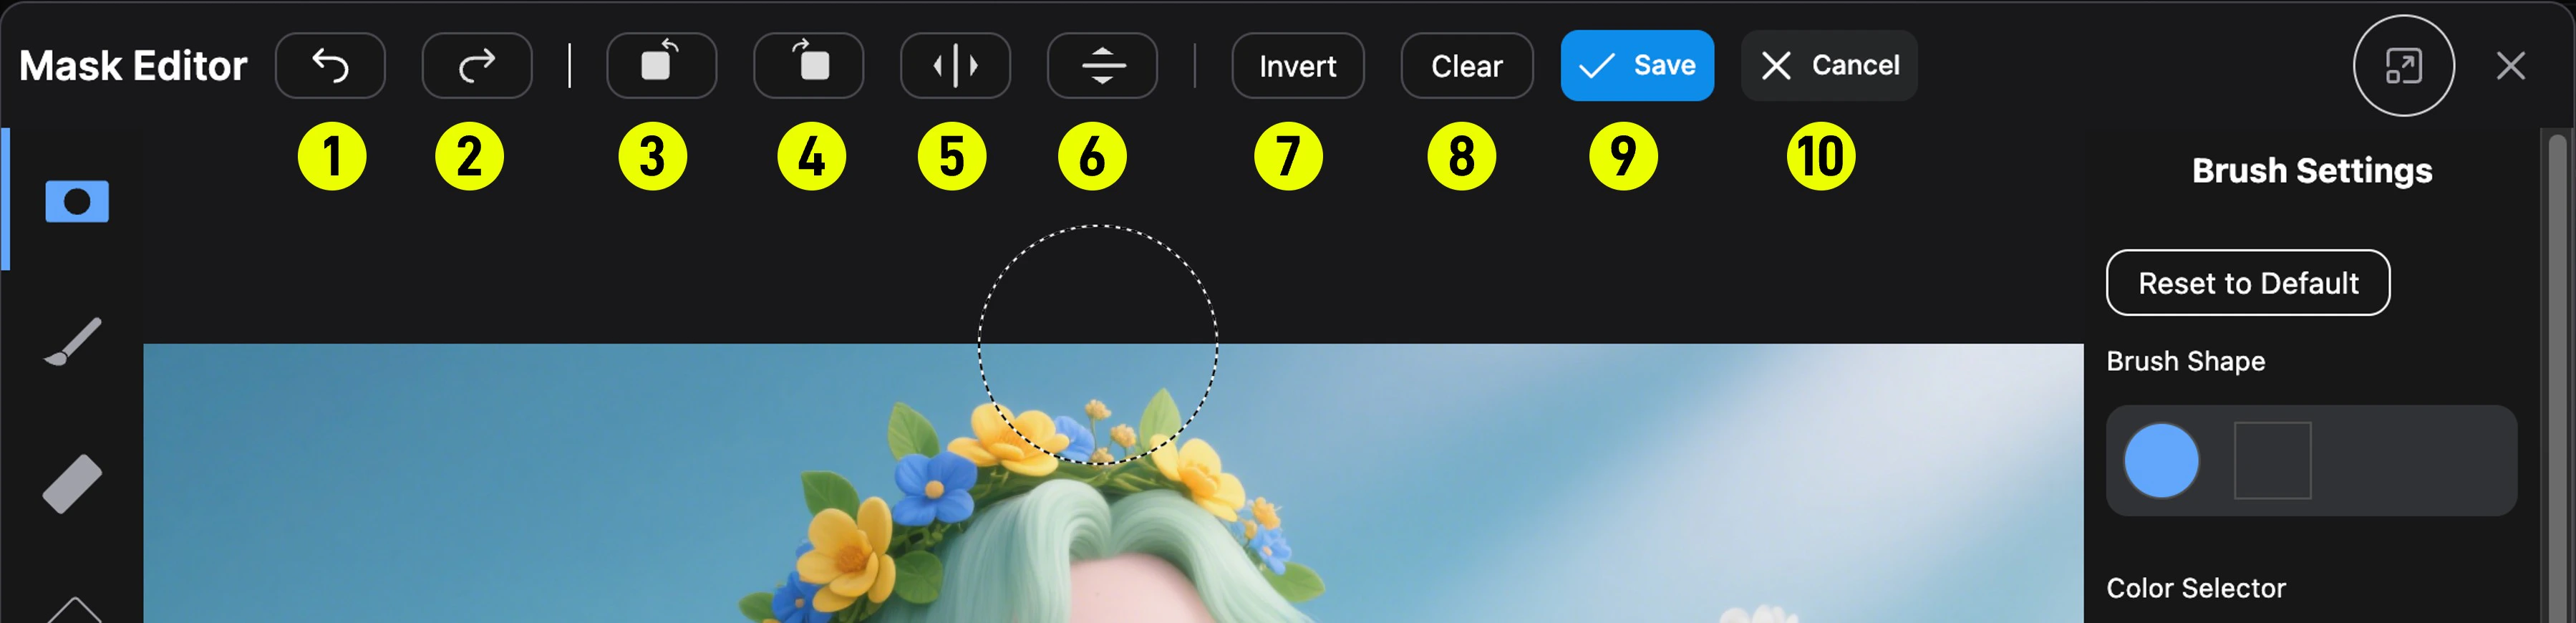
TopBar Actions
| # | Action | Description |
|---|---|---|
| 1 | Undo (Ctrl+Z) | Revert the last action |
| 2 | Redo (Ctrl+Shift+Z / Ctrl+Y) | Reapply a reverted action |
| 3 | Rotate Left | Rotate all layers 90° counter-clockwise |
| 4 | Rotate Right | Rotate all layers 90° clockwise |
| 5 | Mirror Horizontal | Flip all layers horizontally |
| 6 | Mirror Vertical | Flip all layers vertically |
| 7 | Invert | Invert the mask (black ↔ white) |
| 8 | Clear | Clear the entire mask |
| 9 | Save | Save the mask and close the editor |
| 10 | Cancel | Close without saving |
Note: Rotate and mirror operations affect all three layers (mask, paint, and base image) simultaneously. GPU-accelerated textures are recreated after transforms.
Layers
The right panel includes a Layers section where you can toggle visibility of each layer independently:- Mask Layer: The mask overlay. You can adjust its opacity and blending mode:
Black— Mask renders as black overlayWhite— Mask renders as white overlayNegative— Inverted mask rendering
- Paint Layer: The RGB paint layer (visible when using Paint Pen)
- Base Image Layer: The original source image
Brush Settings
When a brush-based tool (Mask Pen, Paint Pen, or Eraser) is active, the side panel shows brush settings:| Setting | Range | Description |
|---|---|---|
| Shape | Arc / Rect | Round brush or square brush |
| Color | Any hex color | The paint color (for Paint Pen) or mask color |
| Thickness | 1–250 | Brush diameter in pixels |
| Opacity | 0–1 | Brush stroke transparency |
| Hardness | 0–1 | Edge softness. 1 = hard edge, 0 = very soft |
| Step Size | 1–100 | Spacing between brush dabs. Lower values give smoother strokes |
Canvas Navigation & Shortcuts
| Shortcut | Action |
|---|---|
| Space + Drag | Pan the canvas |
| Ctrl + Scroll | Zoom in/out |
| Click zoom % | Reset zoom to 100% |
| Ctrl + Z | Undo |
| Ctrl + Shift + Z or Ctrl + Y | Redo |
| Alt + Right-click + Drag | Adjust brush: left/right changes size, up/down changes hardness |
Settings
In the ComfyUI Settings panel, you can configure the following Mask Editor options:| Setting | Category | Default | Description |
|---|---|---|---|
| Brush adjustment speed multiplier | Mask Editor → Brush Adjustment → Sensitivity | 1.0 (0.1–2.0) | How quickly the brush size and hardness change when using Alt+Right-click drag |
| Lock brush adjustment to dominant axis | Mask Editor → Brush Adjustment → Use Dominant Axis | On | When enabled, the adjustment affects only size OR hardness based on your dominant movement direction |
Video Tutorial
Note: This video demonstrates an older version of the Mask Editor (Nodes 1.0 UI) showing brush size adjustment and mask preview creation. The overall workflow remains the same in the current version.